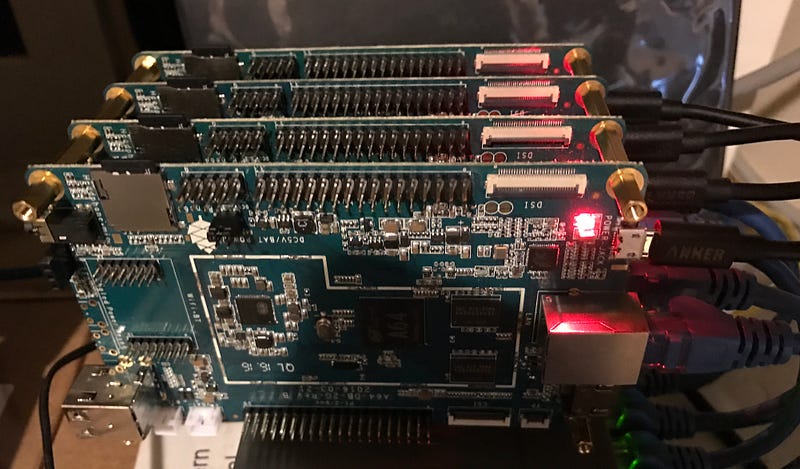
Centos 7 distributions for Pine64, Rock64, Rock64Pro
1. Install Centos-7 into the Pine64, Rock64 and Rock64Pro
The Pine64 board should be able to run Aarch64/ARM64 images. The official Centos-7 supports these images at http://mirror.centos.org/altarch/7/isos/aarch64/. Unfortunately these release don’t run on my Pine64 just yet. However, the Armbian guys have been doing great work and we started a project (loosely based on work done by Uli Middelberg [UMidd]) that takes the Armbian UBoot and Kernel and inserts it into a Centos 7.4 distribution. We have ready to go images for you to download
| Releases for Board | Direct Download Link | Download Size | min. microSD |
|---|---|---|---|
| Pine64 | Centos-7.4.1708 with kernel from Armbian-5.44.img.xz | 496 MB | 8GB |
| Pine64 | Centos-7.4.1708 with kernel from Armbian-5.44 and Gnome Desktop.img.xz | 1.64 GB | 8GB |
| Pine64 | Centos-7.5.1804 with kernel from Armbian-5.44 and Docker v1.13 and OpenShift v3.7.1.img.xz | 803 MB | 16GB |
| Rock64 | Centos-7.4.1708 with kernel from Armbian-5.69.img.xz | 570 MB | 8GB |
| Rock64Pro | Centos-7.4.1708 with kernel from Armbian-5.67.img.xz | 577 MB | 8GB |
All Centos 7 have centos as the root pw, please change after installation!

2. Flash the image
You will need a 8 GB microSD card or bigger. On OSX stick the microSD card into an adapter and into your macbook. It will automount. Open the Disk Utility and check the Device setting, which should be of form disk<n>s1, so something like ‘disk2s1’ for n=2. Now unmount the disk and run something like
sudo dd bs=1m if=centos74-armbian544-pine64.img of=/dev/rdisk2
Warning: in ‘rdisk2’ the ‘r’ means raw disk and writes orders of magnitude faster on OSX and 2 is the value found above for n. You can use control-t to monitor the progress.
3. Boot up your Pine64
Stick your microSD card in the board power it up. If you don’t have an HDMI monitor you can use the following command to see which new SSH server came online:
nmap -sV -p 22 -open 192.168.1.0/24
Make sure to adjust the network setting you are expecting on your network. This command will give you a list of IP address that run SSH servers and you should be able to find IP address for your Pine64 board. Now you can ssh in using ssh root@<ipaddress> and use the default password of ‘centos’. Don’t forget to run the /root/finish-centos-install.sh script which among other things will prompt you to change the root password.
The initial size of the microSD card is 8 GB. To use the full size of your microSD card [StackX] you need to use
sudo fdisk /dev/mmcblk0 (use option `-c=dos` if start sector is out of range)
and type ‘p’ to obtain the list of partitions.
/dev/mmcblk0p1 2048 15138815 7497728 83 Linux
To enlarge the partition first delete it using ‘d’ and then ‘1’. Then ’n’ for createing a new partition and ‘p’ for ‘primary’. Enter ‘2048’ from the start of the second partition above and accept the default for the end, and type ‘w’ to save the partition settings. Now reboot and finally
resize2fs /dev/mmcblk0p1
and once done reboot again. Now
df -h .
should reflect the full capacity of the card. Finally you should run
yum update
to bring Centos-7 distro fully up to date.
4. Optional configuration tips
4.1 NTP
For most application it is crucial the time of your machine is set correctly so it makes sense to run the ntp service so you no longer have to worry about that.
yum -y install ntp
systemctl enable ntpd
systemctl start ntpd
4.2 Switch out NetworkManager for the good old network service
If you’re going to use your Pine64 as a server platform then it makes sense to swap out the (too) dynamic NetworkManager
for the good old network service. You’re going to have to be a bit careful if you don’t have a monitor hooked
up like me that you don’t loose the network while doing this.
Bring up the network service
echo "NETWORKING=yes" > /etc/sysconfig/network
Edit the /etc/sysconfig/network-scripts/ifcfg-eth0 file and set NM_CONTROLLED=no
NAME=eth0
DEVICE=eth0
ONBOOT=yes
BOOTPROTO=dhcp
NM_CONTROLLED=no
NetworkManager runs with a dhcp-help which you need to shutdown before you can startup the network service
killall -9 nm-dhcp-helper
systemctl enable network
systemctl start network
system disable NetworkManager
system stop NetworkManager
4.3 ifconfig
yum -y install net-tools
4.4 NFS
If you want to mount an external NFS share you need to run autofs
yum -y install autofs nfs-utils
systemctl enable autofs
systemctl start autofs
before you can reference your share in your auto.myshare file, for example
sdb2 -rw,soft,intr,rsize=8192,wsize=8192 192.168.1.11:/mnt/sdb2
referenced in the /etc/auto.master file as
/export /etc/auto.myshare
will mount as /export/mnt/sdb2. Make sure the /export directory mountpoint exists.
4.5 Docker and Kubernetes
Look for the distros on the release page that have Docker and OpenShift. In those distros we added the experimental iPaaS repo, that contains RPMs for Ansible, Docker and OpenShift. In those distros we add a /etc/yum.repos.d/Centos-Origin.repo file with the iPaaS Aarch64 repo.
[openshift]
name=CentOS-$releasever - OpenShift Origin
baseurl=https://cbs.centos.org/repos/paas$releasever-openshift-multiarch-candidate/$basearch/os/
enabled=1
gpgcheck=0
and enabled it using
yum-config-manager --enable Centos-Origin
so that now the openshift/7/aarch64 repo should be listed:
yum repolist
Loaded plugins: fastestmirror
Loading mirror speeds from cached hostfile
repo id                                                 repo name                                                        status
base/7/aarch64                                          CentOS-7 - Base                                                  7,571
extras/7/aarch64                                        CentOS-7 - Extras                                                  324
openshift/7/aarch64                                     CentOS-7 - OpenShift Origin                                         74
updates/7/aarch64                                       CentOS-7 - Updates                                                 520
repolist: 8,489
5. References
- [UMidd] Install CentOS 7 on your favourite ARMv8 ARM64 AArch64 board, Uli Middelberg, https://github.com/umiddelb/aarch64/wiki/Install-CentOS-7-on-your-favourite-ARMv8-ARM64-AArch64-board
- [StackX] Resize the root partition: http://raspberrypi.stackexchange.com/questions/499/how-can-i-resize-my-root-partition